Carbon fibre bowl 

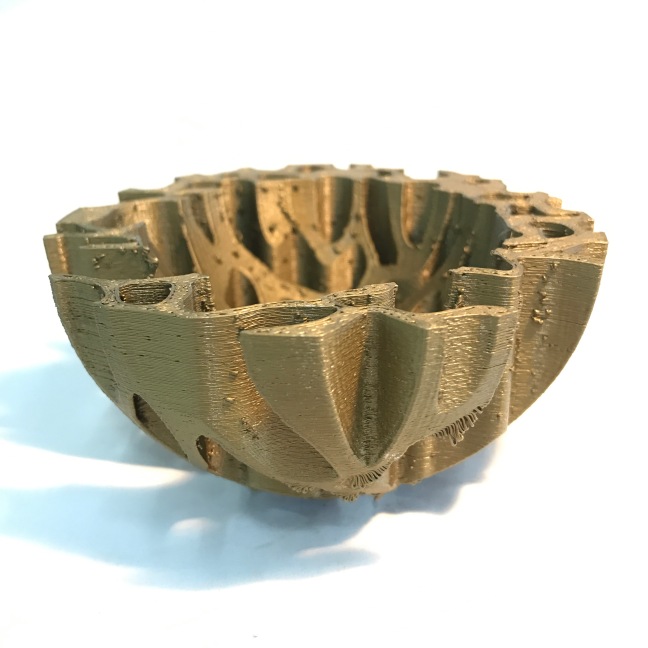
The first of my new filaments I tested was the carbon fibre and I printed this on my home M3D printer.  It printed very easily and the support material was very easy to remove.  The finished material gave very fine lines and felt quite strong.  


I sanded down the top surface to see what the material would look like polished up.  I was really happy with the finish.  It gave a great shine.  

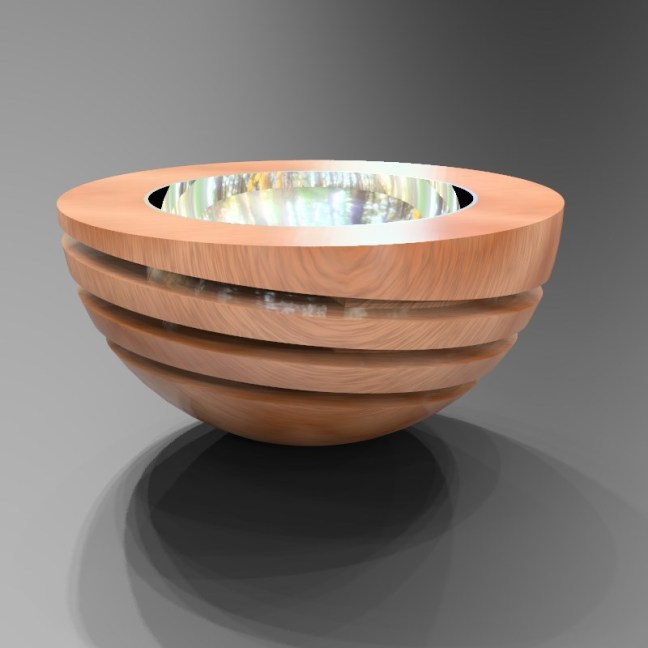
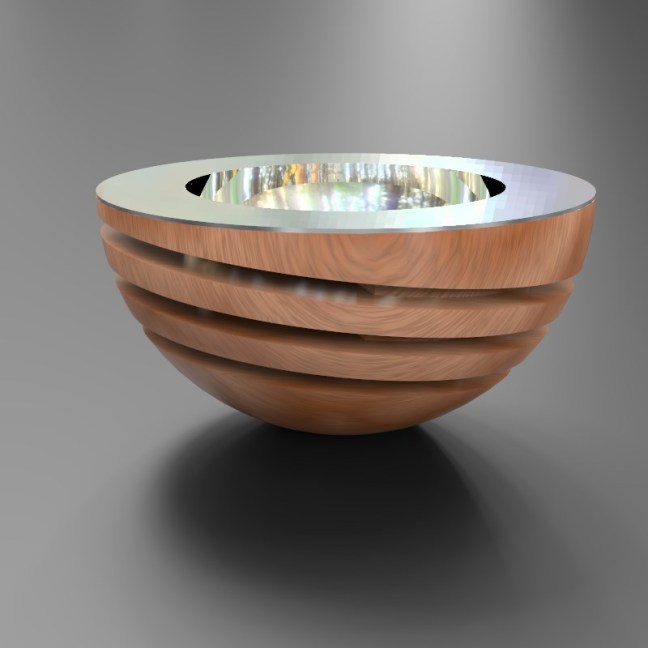
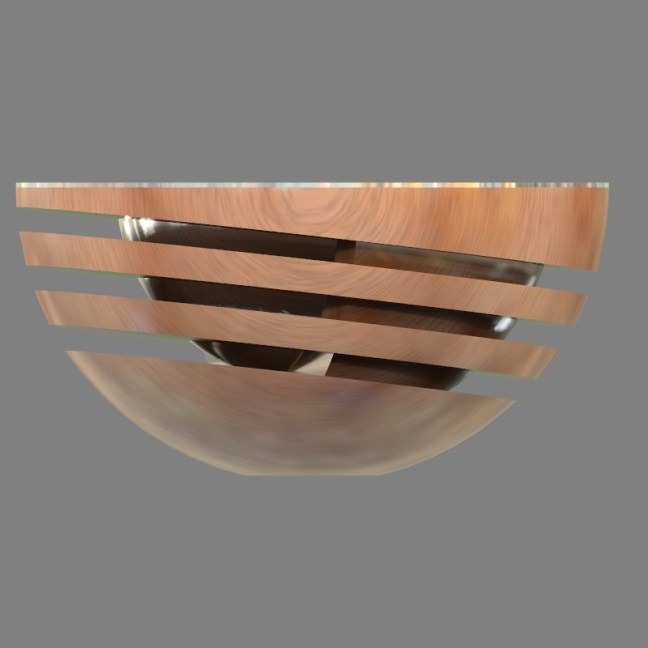
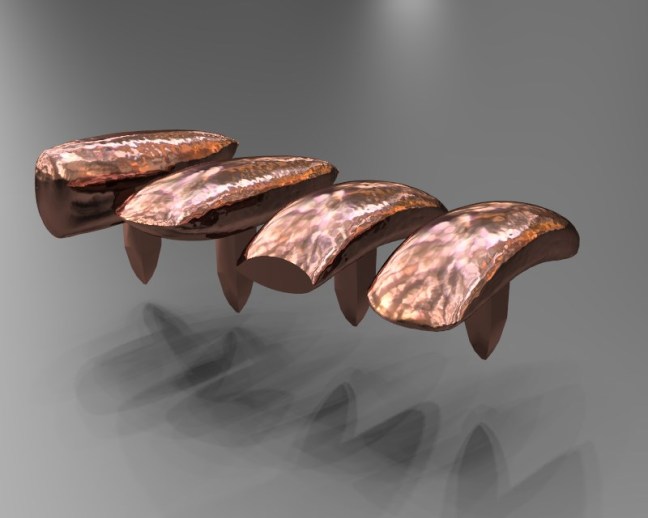
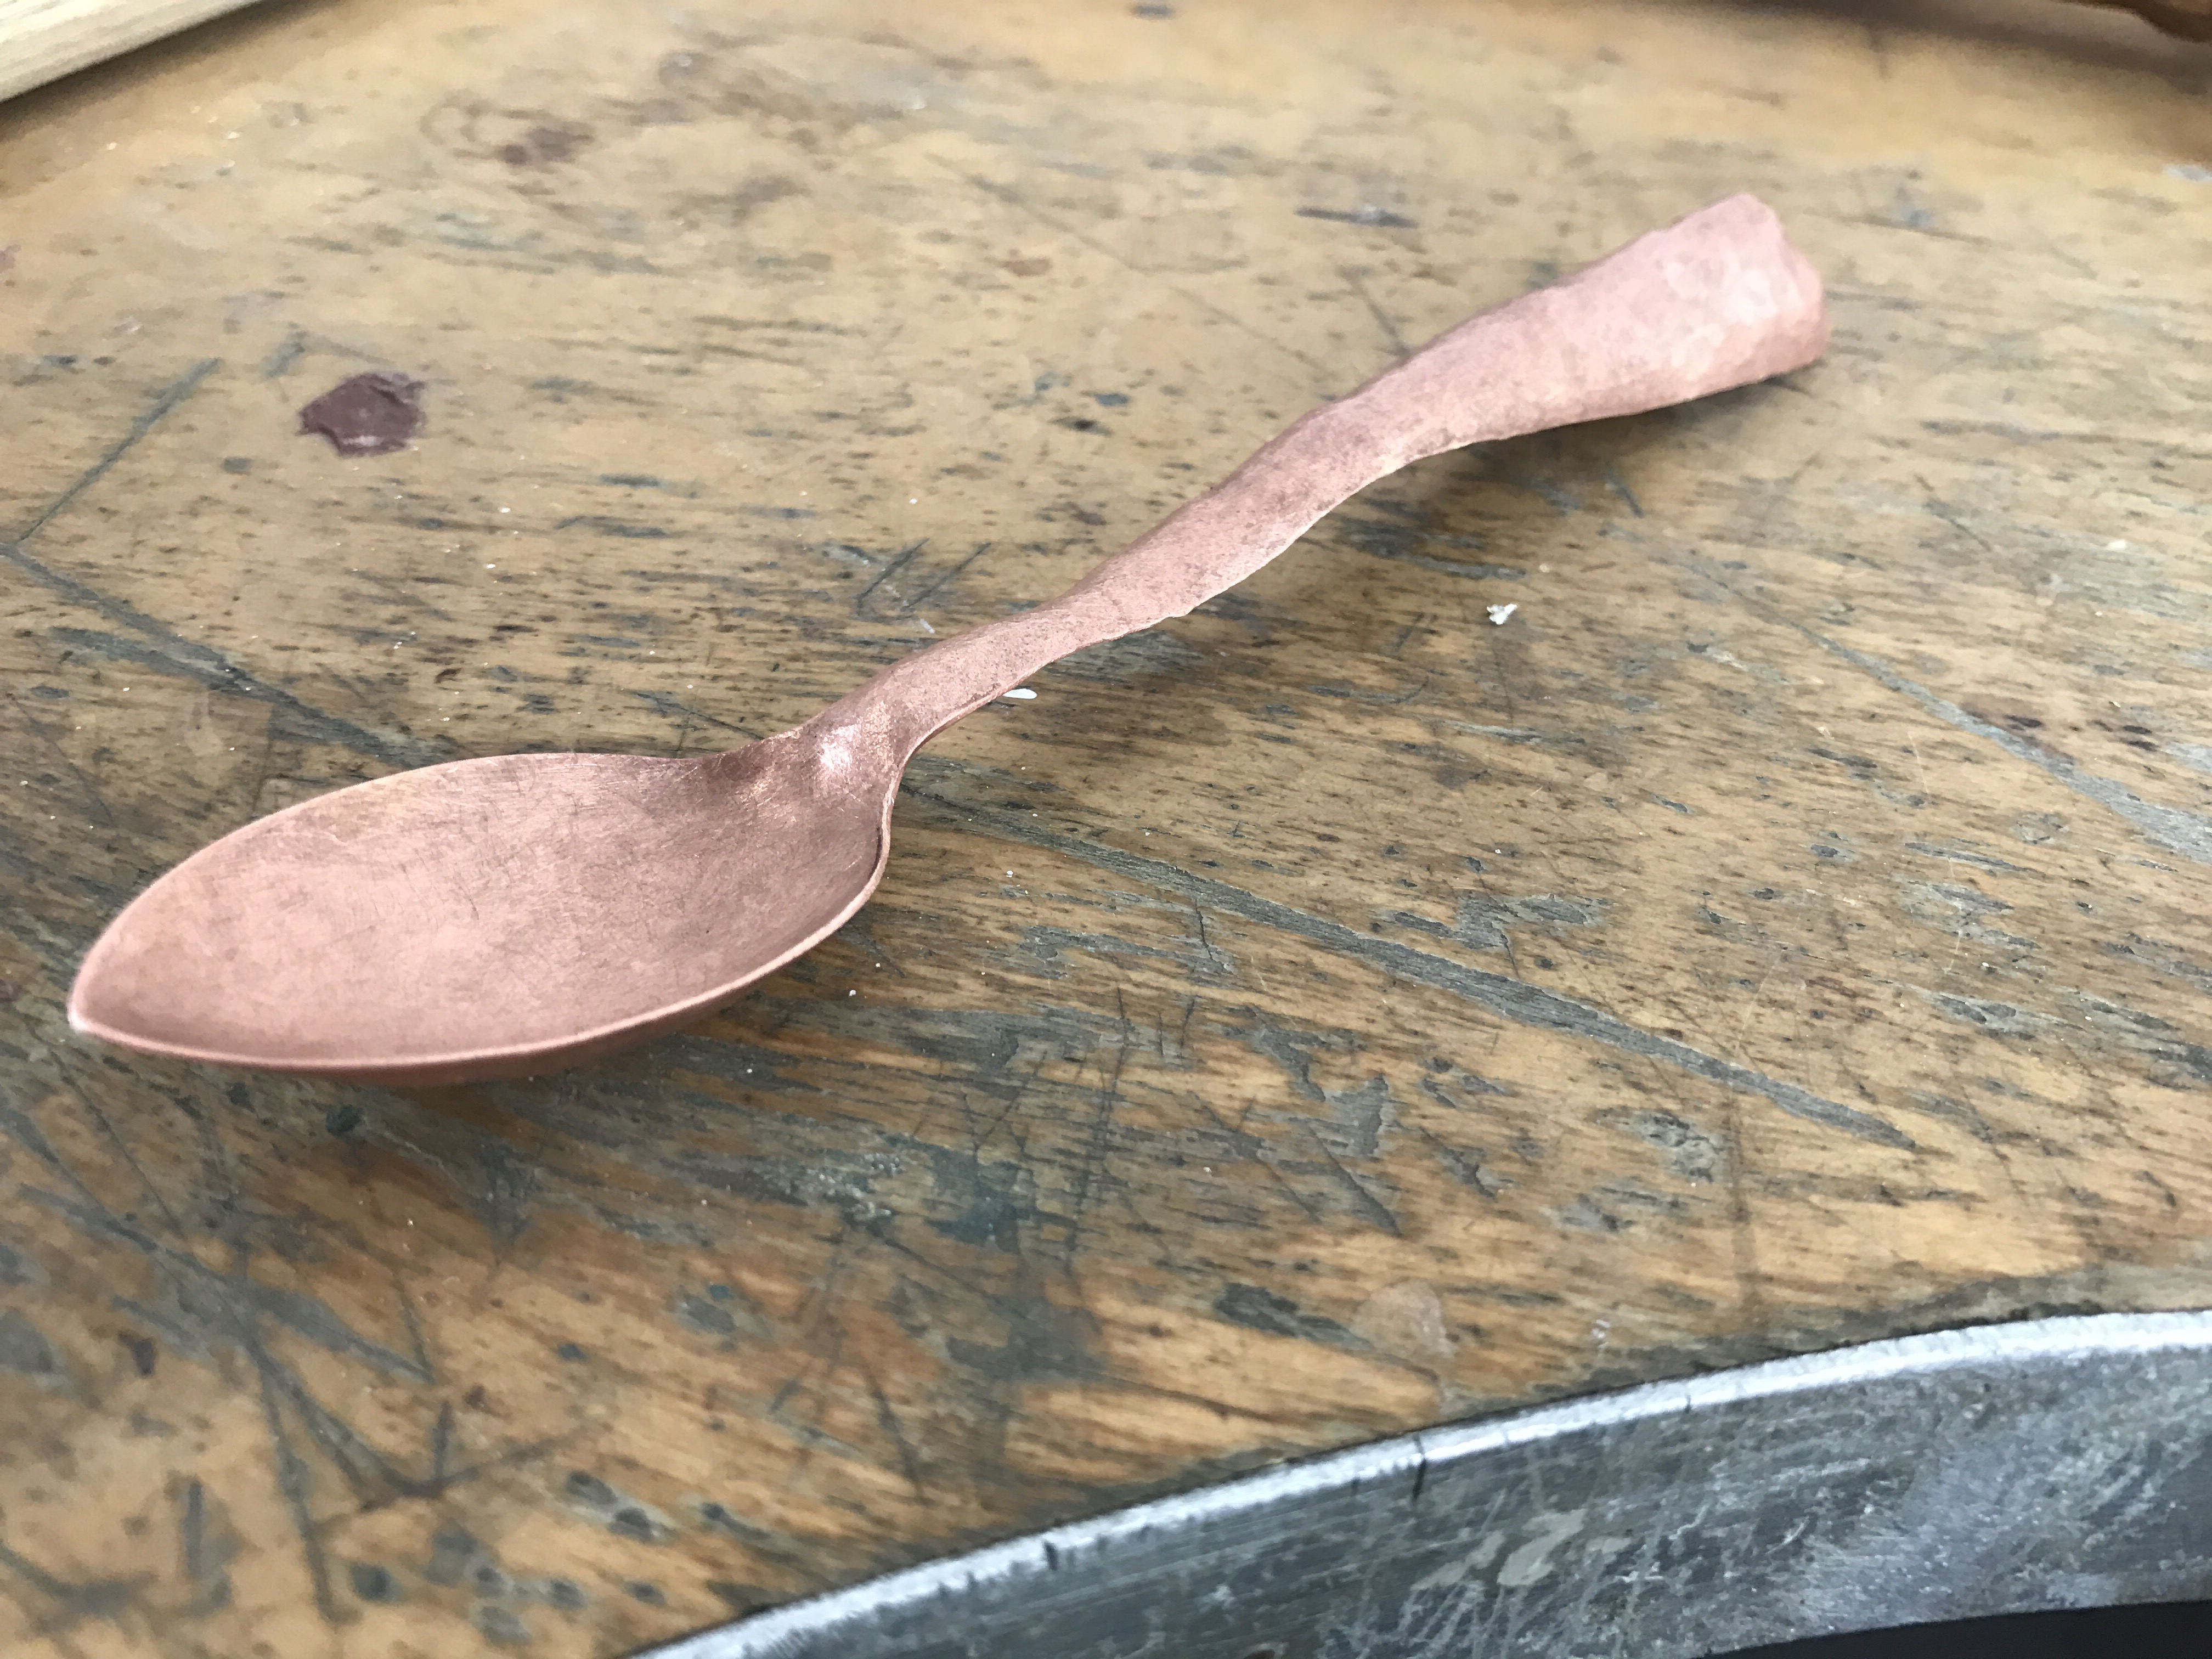
I decided that for this piece I would hand raise the other sections of the bowl using my 3D printed hammers.  ​

I used my laser sintered hammer initially to  planish the bowl.  Unfortunately this broke very soon in to the process.  The internal section looked very powdery due to the two part green process that Shapeways use.  I think this makes the metal much weaker.  I am going to try and reprint this on the direct steel sintering machine in Aberdeen and see if that makes any difference.  
 

I raised a smaller inside bowl to the piece in the same way.  However I had to use a regular planishing hammer to finish off both.  I must confess however that as the inside bowl was so small and fiddly I hand raised it to a certain point and then used the larger doming punch in the department to get the final shape.


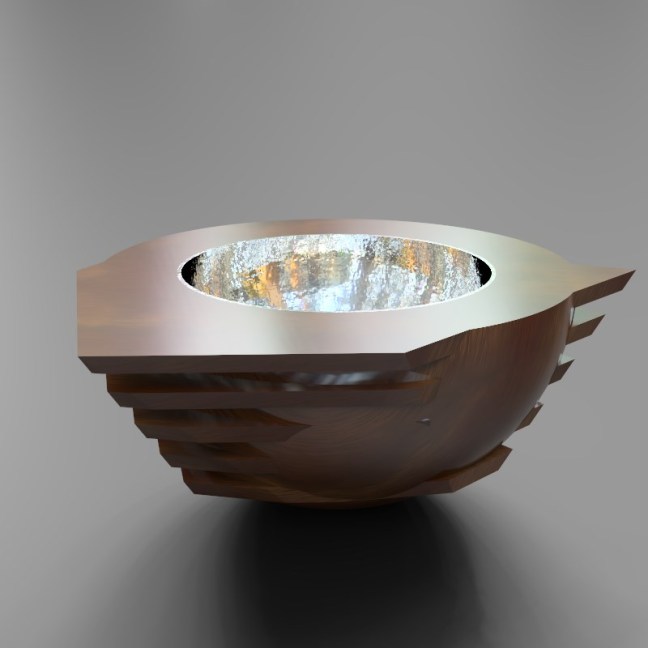
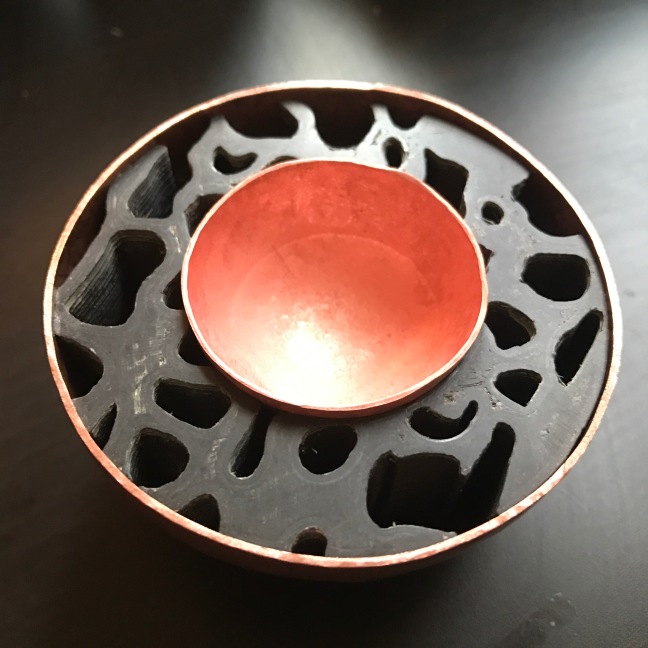
I decided I liked the contrast of copper and black and oxidised the inside of the larger bowl and outside of the smaller.  I used a two part resin and mixed this in to the bowl.  I am regretting not testing this first as it seemed to react.  I am hoping that it will dry enough to sand back and make it look good but if this doesn’t work I will have to re-make it and test another type of resin. The other reason it may have reacted like this would be if there had been some moisture in the bowl before I added the resin.​


Mixed 3D print tests

For the last ​few days I have been testing various 3D printing filaments. The first one I tested was carbon fibre mixed with PLA.  I printed it on a low quality setting, it took about eight hours to print and ran very smoothly.  The support material was very easy to remove.


I tested tough flexible filament in black.  This also printed off very well.  The great thing about this filament was that it fed into the printer with ease and doesn’t snap like some harder PLA.
The final printed object was flexible and I was able to squash it and it returned back to its original form.  I wasn’t particularly happy with the finished print quality though.  It was a bit messy and the support material was very difficult to remove due to the rubbery nature of the material.


I tested a heat change filament.  My home M3D printer had difficulties with this so I printed on the Up machine.  This worked well and printed smoothly and in a good quality.  The support was easily removed.  Although I don’t like the colour the change to white when held in the hand. I have another colour change filament to try which is a little more subtle.

My favourite filament out of this range has to be the brass fill PLA.  I printed this on the UP.  It printed beautifully and the support was easy to remove.  The piece has a really nice weight and sparkles like brass in the sun light.

I also printed a wood fill version.  Initially this was printed on the UP with 1.75mm filament.  This clogged up the machine so it was printed on the larger printer in a thicker filament which worked.  The finished item smells like wood.  When filed it feels like a cross between wood and plastic.  The bowl has a nice weight but I don’t like the messy nodules the printer has left in some areas.  

Laser cut bowl

This morning I amended my laser cutting bowl file from my failed attempt yesterday. I moved out the slats and ran a few tests to make sure the sections slotted in tightly.
I decided not to use any glue when slotting in the sections as yesterday it had reacted with the plastic and left a messy white stain.  

It took a little tweaking to get all the parts to go in to the top and bottom sections, but the final piece holds together well.


I laser cut some rings the same size as the top of the bowl and glued them together using super glue to make a press mold. 


I cut a piece of copper just larger than the press mold and annealed it. 


I then placed the copper on the press mold with rubber above and pressed the copper. 
I didn’t want the copper to snap at the rim so I took it up to two bar and then re-annealed it.

I pressed again taking the pressure up to three bars.  

I then pierced out the edge of the copper bowl and filed it.

I used 280 grit wet and dry paper to put a mat finish on the copper using a circular motion. 

Instead of polishing to a high finish which would oxidise quickly anyway I decided to use platinol to blacken the copper.

I am pretty happy with the finished piece although I am not happy with some of the platinol and may re-apply this tomorrow.

Laser cut bowl 

Today I tried laser cutting some of my bowl designs.  I cut one version that slots in to the top and bottom and one that just slots in to a bottom section with a flat cut top. 


I slotted the pieces together and glued them in to position,  I found that the design was a little tight in the centre section.  It was quite difficult to judge what the line thickness should be in CAD for the slots as the laser melts some material around it.  

After squeezing together the plastic the piece smashed so I will need to redesign it for tomorrow. 

3D printed bowl

I recently got some tough flexible plastic filament for my M3D printer.  I decided to test it using the design I had produced for my CNC bowl.  It took 25 hours to print.  The great thing about the material is that I didn’t have any problems with it snapping mid build as I have with regular filament. 


Once the print was finished I removed it from the bed and started to remove the support material with pliers.  Although the material is very strong and flexible it was quite difficult to remove the supports in a clean way.

Mixed material bowls

I have been spending the last few weeks designing various bowls that I can test materials with.  I plan to make all of the outside sections through direct processes such as laser cutting, syntering and 3D printing.  All the internal bowls I plan to make using traditional techniques only using modern technology to make the tooling.
Laser cutting ideas:

laserbowl1laserbowl2

Laser syntering in steel:

steelsteel2steel3

CNC milling ideas:

walnutbowl1walnutbowl2walnutbowl3walnutbowl4walnutbowl5

Egg cup

​​I got my egg cup back from the milling machine this week.  This time I cut it into walnut as the last one I made I wasn’t particularly happy with the wood.  It was too soft and didn’t have a nice finish after sanding.

I started by cutting out the two sections using my jewellery saw.  ​I first sawed into the frame and then cut each of the supports off one at a time.  I left a little material from the edge of the piece so as to make sure I didn’t cut into the part I needed.

I then sanded both the inside edges flat and glued together using wood glue.


I didn’t want to mark the wood by putting it in my large rusty vice so I decided to bind it with some copper wire.  I found this was better for keeping the edges aligned to each other.  When using the vice, I found the two sections more difficult to keep aligned.

img_4344

After leaving the glue to dry solid,  I filed down the excess supports using a large steel file.  The smaller sections which was harder to file I used a small flat needle file.  The wood was much nicer to work in than the previous one I used.  The walnut felt much stronger and I could feel the difference in quality and way it worked instantly.

After filing off the supports I sanded the piece all over through different ascending sandpapers.

After sanding I put a layer of Danish oil on the wood and rubbed it back afte Continue reading Egg cup

Stone Axe

Today I 3D scanned a stone aged axe my Grandad found many years ago in England. I have always loved the shape and form of the tool and how it fits perfectly into the hand.

I wanted to use this form to create tools to make forms for pieces for the house.

I scanned the axe at the university and then used the files to create both silversmithing stakes and hammers.

axerend

For the stakes I kept the original size of the axe and added a section that would allow it to be gripped in a vice.  For the hammers I scaled down the model to 85mm and cut out a hole for the handle.

stoneaxehammersAxestakes

I am planning on 3D printing the models and casting them possibly in bronze.

Egg cups continued…….

I have been working more on my egg cups this week. I just? I am now happy with the general shape of them. If there is one thing I am a little disappointed about it is that I have lost the thickness created by colquing the edge and then cutting it off.

https://youtu.be/mFLEpmtltxU

I started planishing one of the cups. I soon found that there were a few lines still visible in the head of the hammer from the 3D printing. I sanded and polished these out before continuing.​​

 ​Before planishing the cups I annealed the copper again and drew on lines as I did when raising.  I then planished from the inside out twice and I may repeat this again.  I am happy with the shine this has created.