Laser cut bowl

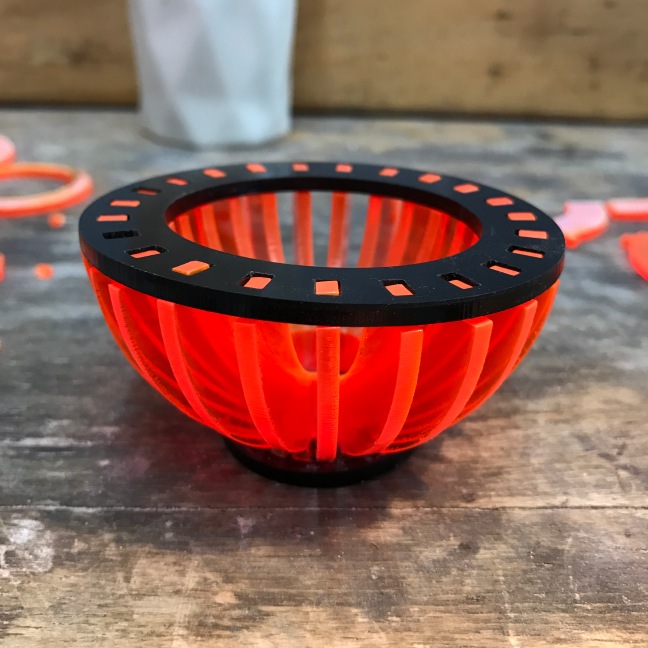
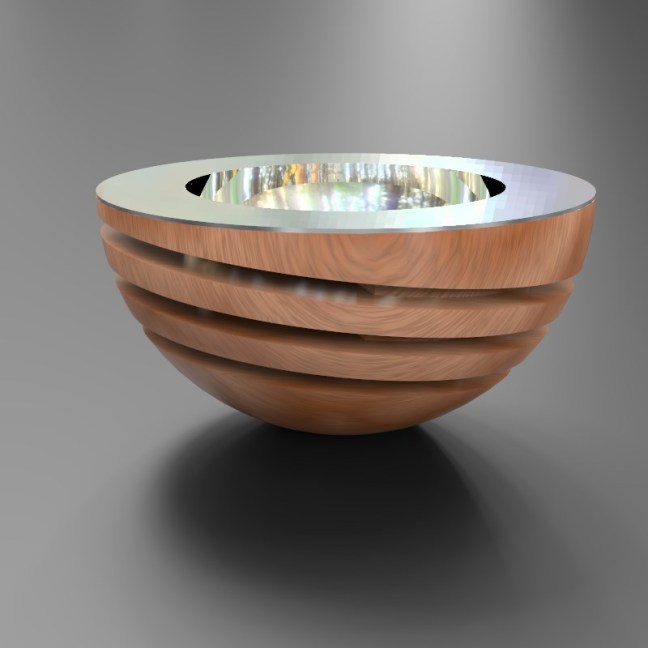
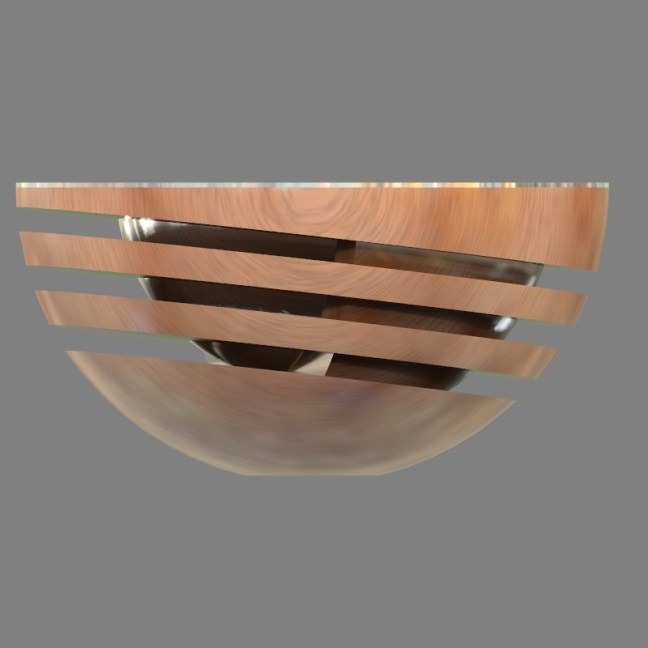
This morning I amended my laser cutting bowl file from my failed attempt yesterday. I moved out the slats and ran a few tests to make sure the sections slotted in tightly.
I decided not to use any glue when slotting in the sections as yesterday it had reacted with the plastic and left a messy white stain.  

It took a little tweaking to get all the parts to go in to the top and bottom sections, but the final piece holds together well.


I laser cut some rings the same size as the top of the bowl and glued them together using super glue to make a press mold. 


I cut a piece of copper just larger than the press mold and annealed it. 


I then placed the copper on the press mold with rubber above and pressed the copper. 
I didn’t want the copper to snap at the rim so I took it up to two bar and then re-annealed it.

I pressed again taking the pressure up to three bars.  

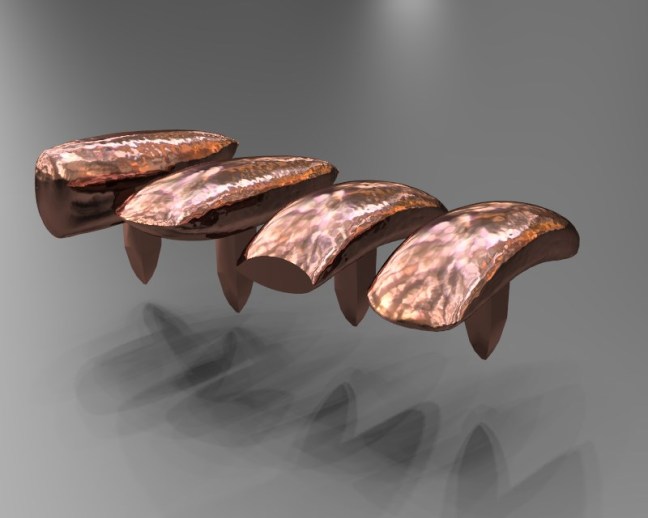
I then pierced out the edge of the copper bowl and filed it.

I used 280 grit wet and dry paper to put a mat finish on the copper using a circular motion. 

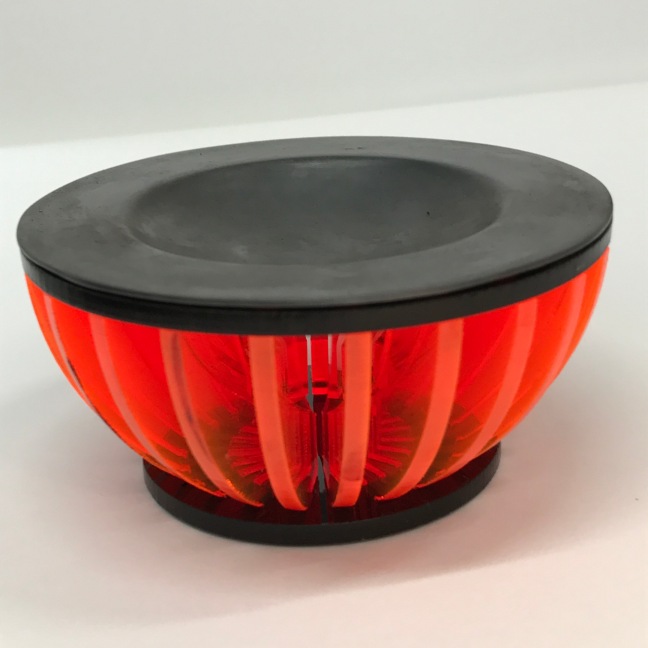
Instead of polishing to a high finish which would oxidise quickly anyway I decided to use platinol to blacken the copper.

I am pretty happy with the finished piece although I am not happy with some of the platinol and may re-apply this tomorrow.

Laser cut bowl 

Today I tried laser cutting some of my bowl designs.  I cut one version that slots in to the top and bottom and one that just slots in to a bottom section with a flat cut top. 


I slotted the pieces together and glued them in to position,  I found that the design was a little tight in the centre section.  It was quite difficult to judge what the line thickness should be in CAD for the slots as the laser melts some material around it.  

After squeezing together the plastic the piece smashed so I will need to redesign it for tomorrow. 

Mixed material bowls

I have been spending the last few weeks designing various bowls that I can test materials with.  I plan to make all of the outside sections through direct processes such as laser cutting, syntering and 3D printing.  All the internal bowls I plan to make using traditional techniques only using modern technology to make the tooling.
Laser cutting ideas:

laserbowl1laserbowl2

Laser syntering in steel:

steelsteel2steel3

CNC milling ideas:

walnutbowl1walnutbowl2walnutbowl3walnutbowl4walnutbowl5

Stone Axe

Today I 3D scanned a stone aged axe my Grandad found many years ago in England. I have always loved the shape and form of the tool and how it fits perfectly into the hand.

I wanted to use this form to create tools to make forms for pieces for the house.

I scanned the axe at the university and then used the files to create both silversmithing stakes and hammers.

axerend

For the stakes I kept the original size of the axe and added a section that would allow it to be gripped in a vice.  For the hammers I scaled down the model to 85mm and cut out a hole for the handle.

stoneaxehammersAxestakes

I am planning on 3D printing the models and casting them possibly in bronze.

Raising Hammer

Last week my handle for the raising hammer I made in Hungary was CNC milled in birch wood.  It had taken quite a lot of time because previously it had been milled in oak.  When I spoke to the wood technician he said that the grain of the wood was at an angle and that this would split when used.  It brought up a very interesting conversation about the need for craftsmen and traditional crafts skills in the field of modern technologies.  Not all items made using modern technologies will work or be better than something handcrafted but that it is the knowledge of both that are needed to apply ideas.

  
I glued the handle together in the workshop with wood glue and clamped together for around an hour.

 When the handle was taken off the milling machine it had supports on the sides, I cut these off with a saw.  I then filed and sanded the handle and fixed the hammer head in using epoxy resin.

  
I am now using Danish oil on the handle every day for the next week.  I still have to drill a hole through both the handle and the head to fix a rod through.


Seahorse Hammer

So right now I am in Mátranovák, Hungary.  I have spent the last few days sand casting hammers in brass.  The first one I tried was the seahorse claw hammer.

I made the sand casting mold in the usual way.  First I compacted the sand into the bottom part of the mold.  After scraping the sand flat I roughly carved out a space for the 3D printed hammer.

I compacted the sand flat around the centre line of the print and then coated in talc.


I added the top part of the mold and compacted the sand with a mallet.  After reaching over the top line I scraped back the top so it was flat.

I then opened the mold and took out the 3D printed plastic hammer and the tube I used for the pour hole.

I placed the mold back together and clamped the edges.

I then took the mold to the local blacksmith Laci bácsi, who helped me cast the piece in Brass.

He first smashed up lots of pieces of coal into small pieces for the furnace.

He then lit the furnace with some small pieces of wood and then added the coal.

  
The mold was left close to the furnace to heat a little and was turned after ten minutes to heat the other side.

  
The metal was left to heat for around 20 minutes before it was liquid enough to pour.​

​After around five minutes after the pour the metal was solid enough to open the mold.


Laci bácsi and myself were both very happy with the result.


The hammer was quenched in water and I am now left with the task of finishing off the piece.


Crochet Bowls

Today I got my crochet bowls back from the kiln.  I am very happy with the glazes and certain elements of them.  I like how they have transformed from CAD into something organic and handmade.

I have made one big mistake in the making of these and that is that I used porcelain with a much lower firing temperature glaze.  The result of this is that over time the glazes will crack.  Next time I will be buying in some earthen wear slip to try and this should stop them breaking.


Tension Saw Design

Over the last week I have been designing a tension saw I can 3D print and use both to make my jewellery as well as items for the house I am building.  Firstly I created a wire frame which looked very similar to my jewellery in triangulated forms.  When I piped this using T-splines it made the piece look almost sewn together, which I ran with.  It is still a triangulated form so I hope this means it will hold a lot of strength when in use.  I also made this from a frame to cut down on material for cost as well as weight in use.

saw

saw2

Initially I designed a traditional fitting where the saw blade would have been bolted, however I changed this as I wanted a more contemporary design.

My final design I made bolts and a handle that match the saw frame.  I plan to 3D print the entire thing in the next few weeks using steel for the frame and bolts and either wood or plastic for the handle.

Saw6Saw4

Claw Hammer

For the last day or two I have been designing a claw hammer for larger scale use such as building my house.  I went through a few designs and decided I would make use of the CAD and design the hammer so that I wouldn’t have to wedge the handle at the top in a traditional way.  I designed the handle and the hammer head so that they join in the handle shaft.  hammer9

I got a little carried away with the handle when the hammer head started to look a little like a seahorse.  I’m not sure if I will keep the base section exactly like this or if I will simplify it a little before production and comfort.  I am hoping to cast the top section in bronze and get the handle either milled in wood or 3D printed in hard clear resin.

hammer5

Colander

For the last two weeks I have been settling in to my new life in Dundee.  I have been getting equated with the university campus and finding my way around.  I have been buying glaze for my shot glasses as well as printing more press moulds.

Today I set myself the task of designing a colander for the kitchen of my shipping container.  I find the kitchen implements quite and interesting area of my study as it is both a tool and could be 3D printed or I could also go down the line of hand building them.

I feel that as I have to build everything in my house some simpler items such as colanders should be directly 3D printed to save time.  However I am still aware that I would like to focus on the aesthetics of the piece.

I had a few ideas I ran through in my sketchbook looking at cell structures and geodesic domes.  Here is the first CAD model I have made:

collinder

This design was inspired by the roof design’s of both Buckminster Fuller’s domes and Grimshaw’s Eden Project.  The only concern I have is if the holes in the piece are too big it will be impractical and food will fall through it.  I will print this to test first.